1. Navigating the $Nummus Token Dashboard
Down the lefthand side of your ‘Dashboard’ you can see some tabs. We will go through their functionality individually.
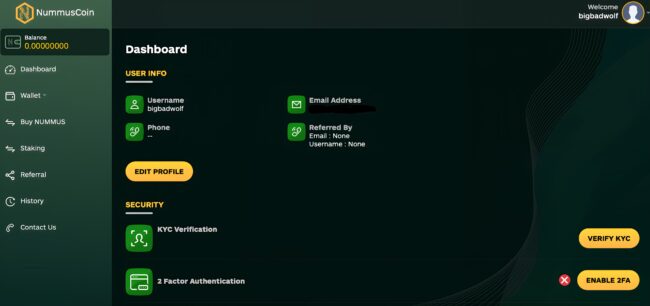
The left-hand side of your dashboard features several tabs, each with specific functionalities:
- Balance: View the total amount of $Nummus Tokens you own.
- Wallet: Access the ‘Deposit’ and ‘Withdrawal’ sections.
- Buy $Nummus: Buying $Nummus with your crypto.
- Staking: Make the most of your $Nummus.
- Referral: Refer a friend for extra benefits.
- History: View all your ‘Transactions’ and ‘Staking’ history.
- Contact Us: We’re here to help you.
2. Viewing Your Balance
- Balance Tab: You can always see your $Nummus Token holdings on the Dashboard.
3. Using Your Wallet
When you click on ‘Wallet’, there are two subsections ‘Deposit’ and ‘Withdrawal’
3.1 Depositing BTC, ETH, USDT, and $NUMMUS
- By clicking on ‘Deposit’, you are wanting to receive BTC, ETH or USDT to your account.
- When you click on the crypto of choice, you will see the unique address that you must send your crypto to.
- When you or others are sending either BTC, ETH or USDT to your Nummus Wallet, these are the wallet addresses you must send them to.
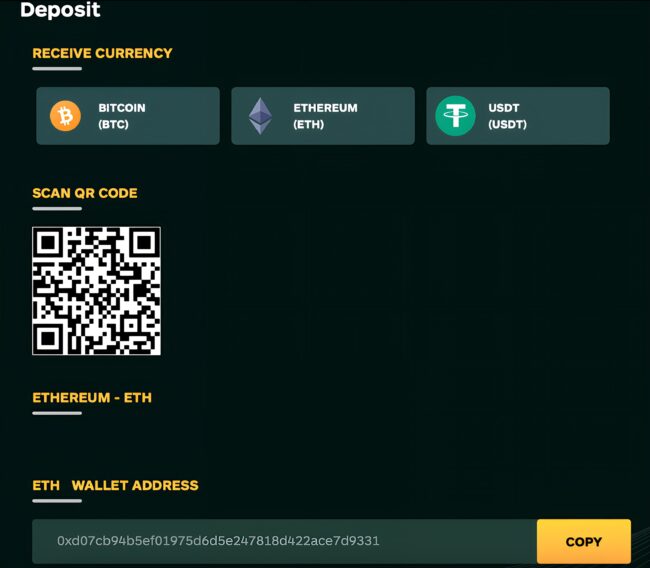
- Open Wallet: Click ‘Wallet’ and then ‘Deposit’.
- Select Crypto: Choose BTC, ETH, or USDT.
- Copy Address: Copy the unique address provided for the selected cryptocurrency.
- Send Crypto: Send the chosen cryptocurrency to this address.
* Be very careful to choose the correct depositing address for your crypto, and ensure that for ETH and USDT, you only send them through the Ethereum or Binance network from your exchange or broker. Failing to do so might result in the loss of your crypto and we cannot be held responsible for that.
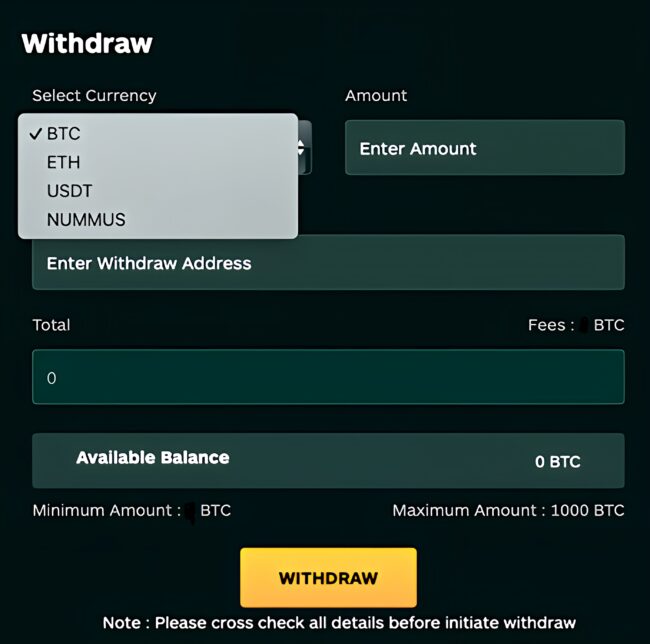
3.2 Withdrawing BTC, ETH, USDT and $NUMMUS
If you click on ‘Withdrawl’ for the first time, a 2FA activation screen will appear. Please go to ‘Activating 2FA for Added Security’ for additional information on how to do this.
Once you have activated your 2FA, you will see this screen when you want to withdrawal -
- Open Purchase Screen: Click ‘Buy $Nummus Tokens’.
- Select Currency: Choose BTC, ETH, or USDT for the purchase.
- Enter Amount: Specify the amount of digital currency you wish to spend.
- Review and Buy: Review the total $Nummus Tokens after network fees and bonuses, then click ‘BUY’.
*Be very careful to choose the correct withdrawal address for your crypto. Failing to do so might result in the loss of your crypto and we cannot be held responsible for that.
4. Buying $Nummus Tokens
Okay, you’ve now got either BTC, ETH or USDT in your account and you want to take advantage of the incredible $Nummus Token presale.
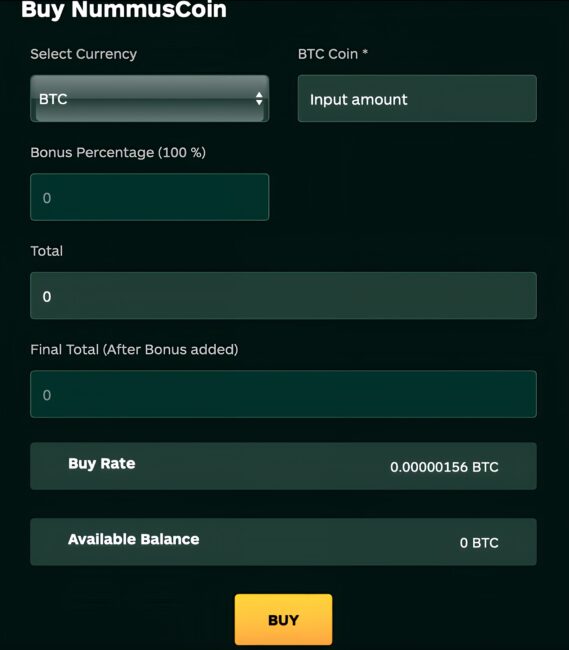
- Open Purchase Screen: Click ‘Buy $Nummus Tokens’.
- Select Currency: Choose BTC, ETH, or USDT for the purchase.
- Enter Amount: Specify the amount of digital currency you wish to spend.
- Review and Buy: Review the total $Nummus Tokens after network fees and bonuses, then click ‘BUY’.
Your $Nummus Tokens will appear in your wallet.
5. Staking $Nummus Tokens
With staking, you can put your $Nummus Token to work and earn a passive income without selling them.
The best way to think about is that staking is similar to depositing cash in a high-yield savings account. You agree to lock your savings in an account for a set period of time and the banks agrees to give you earn interest on your account balance. They, in turn, lend out your deposit for a greater return.
You can stake your $Nummus Tokens for as little as a month or as long as 12 months.
Please see article ‘Receiving your NFT’ for added staking perks and passive earning potentual.
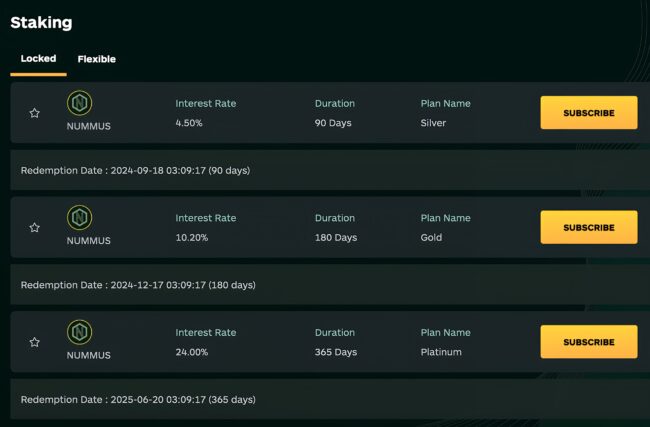
- Open Staking Screen: Click ‘Staking’.
- Choose Agreement: Select ‘Locked’ or ‘Flexible’ agreement.
- Enter Amount: Specify the amount of $Nummus Tokens to stake.
- Confirm Staking: Review the terms and confirm the staking.
As you can see, the longer you will lock your tokens, the better the percentage of returns. The best returns are a 24% yield for staking your tokens for 365 days. For example, you stake 1000 $NUMMUS on 02.01.25 for 365 days. On 01.01.26, you will own a total of 1240 $NUMMUS.
6. Viewing Your History
- History Tab: Click ‘History’ to see all your transactions and staking activities.
7. Contacting Support
- Support: For any assistance, please contact our support team through the provided channels on the website.
8. Activating 2FA for Added Security
2 FA stands for ‘Two-factor Authentication’, sometimes referred to as two-step authentication. It is your choice whether to add a second layer of security by enabling it. However, if you do wish to send $Nummus Tokens from your wallet, it will need to be enabled to complete any withdrawal transaction.
In the bottom right corner of the DASHBOARD screen, you will see an ‘ENABLE 2FA’ button. You will then be shown this screen
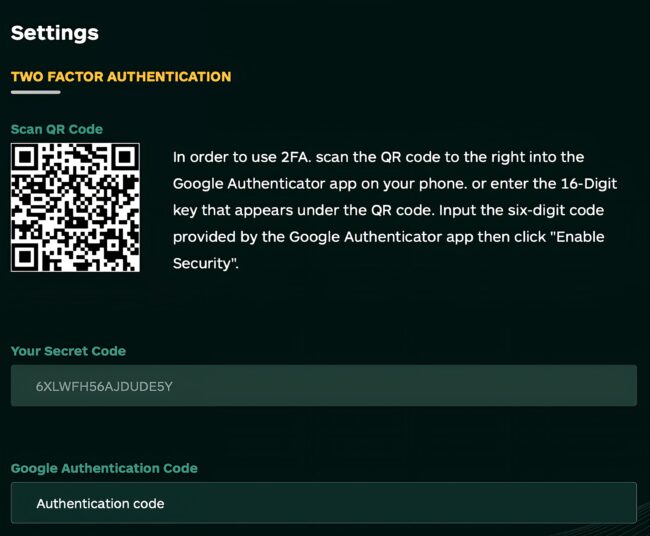
- Enable 2FA: Click ‘ENABLE 2FA’ at the bottom right of your screen.
- Download App: Download the Google Authenticator app on your mobile phone.
- Scan QR Code: Scan the QR code displayed on the website with the Google Authenticator app.
- Enter Code: Type the six-digit code from the app into the ‘GOOGLE AUTHENTICATION CODE’ field and click ‘ENABLE 2FA’.
- Withdrawal: You can now withdrawal your crypto.